|
|

|
|
Links we like
Disclaimer: we take no responsibility for external links on this page.
- Last Ride of an SS Jaguar 1967
- F&P dish drawer - Can I fit a DD601V2 controller to an original DD601?
- Bradford Exchange Flying Scotsman clock - How to fit a mains adapter DC supply?
- How to fix your Acer Inspire One with a black screen (Black screen of death), or won't connect wireless internet.
- How to reduce the size of digital pictures
- How to print and email pdf files
- A Camping Checklist as a pdf document. Use for camping, yachting or holiday trips.
- NZ Telephone Directory
F&P dish drawer - Can I fit a DD601V2 controller to an original DD601?
Well I tried this and the answer is no. The original DD601 main controller board is part number 525189, coloured orange. The DD601V2 had some changes due the the original DD601 dish drawers failing when a teaspoon jammed the main rotor. The V2 model has the addition of a hall sensor which detects magnetically if the main rotor is rotating and throws up an F2 error if not. The controller has a connector for the hall sensor which of course is not there. After a short run the F2 error shows (hall sensor fault) and that's that. I did manage to obtain a DD601 controller (new number 525189RP) from Axial in NZ. The second one they sent me actually worked. F&P just said it was unobtainable and obsolete.
Bradford Exchange Flying Scotsman clock - How to fit a mains adapter DC supply?
The clock has a power connection for external 3VDC power. The connector requires a 3.5mm DC plug with 1.5mm centre socket. The + centre connection goes direct to the 3V D-size batteries which you must remove. Current load is about 1 Amp. I used a 6V DC power pack with an adjustable DC buck converter, these are only a couple of dollars on TradeMe or eBay. Adjust to 3.0 or 3.1V before connecting. You still need the 1.5V AA battery for the clock and pendulum.
How to Fix your Acer Inspire One with a black screen or will not connect to wireless internet
This is how to fix your Acer Inspire One ZG5 Netbook when it refuses to starts up, has a black screen and only the power light is showing. (Black screen of death).
What has happened is the BIOS startup has been corrupted and the Acer manual will not tell you how to fix it. You can, of course, send it to Acer, they will charge you money and say they fixed it. Actually, it happens often and you will probably have it happen again in a few months.
You can go to this site that explains it all, and fix it yourself. You will need to know how to format a USB memory stick with FAT format, rename downloaded files and boot from a USB port.
Acer service at NZ phone 0800 223 769 will no doubt help you for a fee.
Another problem with the Acer ZG5, the wireless modem driver has not been updated by Acer and it may not connect to some newer modems on Win XP. It shows good wireless connection, but the browser cannot connect to the Internet. What you need is this updated driver Wireless LAN_Atheros_7.7.0.456_XPx86_A.zip I found it here.
How to reduce the size of Digital Pictures
Here is how to reduce the large pictures your camera takes, to a reasonable size for emailing or putting on your blog. A lot of people still use dial-up for Internet, and receiving megabyte size pictures does not make them very happy when an email takes more than a half hour!
This method works on Windows PC computers, and uses MS Paint.
1. Put Paint on your Desktop
Paint is such a handy program, you should put an icon on your desktop as follows:
- Click Start, then without clicking anything, move the cursor onto Programs, Accessories and then you should see a list of about 12 programs.
- Move the cursor onto Paint and press right-mouse-button (you get a list).
- Select Send-To, and left-mouse click on Desktop (create shortcut).
- Now you can bring up Paint by clicking on your desktop icon. I suggest you do exactly as above, for Windows Explorer, which is also in the Accessories group.
2. Load the Camera Photo
You will have already downloaded your camera, probably into 'My Pictures', that's where mine go.
Bring up Windows Explorer, look into My Documents, My Pictures, or wherever your photos are stored.
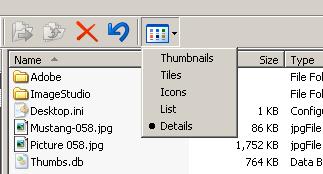 See that little box with the 6 dots, click your mouse on that and you can
view Thumbnails (small images of your pictures) or Details (you can see the size of the picture). Both are handy.
See that little box with the 6 dots, click your mouse on that and you can
view Thumbnails (small images of your pictures) or Details (you can see the size of the picture). Both are handy.
3. Don't lose your originals!
Here's what you do.
- Open your original picture with File, Open on the top left of Paint.
- Now, save that picture with a new name, with File, Save As. The original name will be highlighted, overtype it. In this example, it is Picture 058. It was a Mustang aeroplane so I called the new picture Mustang-058. Paint will automatically attach the filename extension, so it will be saved as Mustang-058.JPG. Don't put a fullstop after the filename unless you are putting in the full extension yourself, such as Mustang-058.jpg.
- If this is for emailing or for your blog, it is a good idea to also put 'lowres' into the name for 'low resolution'. Your name might be Mustang-058-lowres.JPG. If you are cropping a picture for later printing, put 'hires' into the name and don't reduce the size as below.
4. Reduce the Size
Now it has a new file name, and you are not going to destroy your original, reduce the size.
- Click on Image, Attributes and note the size. My picture is 3008 pixels wide, 2000 pixels high. You can select inches and cm if you prefer.
- A good size for emailing is about 640 x 400, 800 x 532 or 1200 x 800. Let's make this 800 wide. A little maths with your calculator (800 divided by 3008) will show that you want the picture shrunk to 0.27 or 27% of original. Click Cancel to close the size box.
- Click Image, Stretch,Skew and type 27 (27%) into both boxes, then OK. You will now see your smaller image.
- Click File, Save. In this example, my picture has gone from 1,752 Kbytes (1.7 M) to 87 Kbytes. A very good size to email or put on your blog.
- Let the people know that high resolution versions of the pictures are available. Otherwise they will printout grainy pictures from the emailed or blog versions instead of the nice sharp crisp one that you took.
5. Organise your Photos
If you don't know how to file away all your pictures into folders with proper names like 'Holiday November 06' get some assistance from your friendly computer Guru who will show you how to create folders, copy and move your files using Windows Explorer. Otherwise, you will soon have 5000 pictures in My Pictures and life will get very tedious. As my friend said recently - ' I took some great pictures of your car and I downloaded them into my computer and now I can't find them anywhere'. Gee, great!
6. How to Crop the Image
Rather than just shrinking the original, you might like to crop the image and cut out that rubbish bin beside Grandma. I must say, Photoshop's Crop Tool does this better than MS Paint.
- Reduce your image, as above, so you can see it all on the screen and it is a bit bigger than you want it.
- You can alter the picture size by putting the mouse on the little dot (handle) of either the middle of the right hand side, or the centre of the bottom of the picture.
- When the cursor goes over the handle, you will see two arrows, and by holding the left mouse button, you can drag the edge of the picture across, or upwards, effectively resizing it.
- File, Save As.
- Or, to crop a piece out of the picture, first click on the Select Tool

- Then starting at top left, hold the mouse button and you can mark a portion of the picture.
- Edit, Copy (copies that marked part in the select tool box)
- File, New (save changes - Cancel)
- Image, Attributes type 10 by 10 pixels (not Inches or cm). If you don't do this you can end up with a lot of white around the cropped picture.
- Edit, Paste (or CTRL V if you know that trick).
- File, Save As (suggest you put 'crop' in the file name).
I hope this has helped :-) Here's four books that look pretty good.
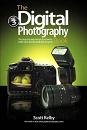
The Digital Photography Book: v. 3 The Digital Photography Book, Volume 3 follows on from the earlier books. It's even more of that "Ah ha--so that's how they do it," straight-to-the-point, skip-the-techno-jargon stuff you can really use today to make your shots even better. |
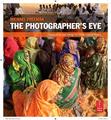
The Photographer's Eye: Composition and Design for Better Digital Photos Covers both traditional in-camera composition and the new opportunities for picture-making made possible by digital imaging editing. Shows how to explore situations and locations in order to find the best possible photographic possibilities. |
How to Print and Email PDF files
While you can do this by buying Adobe Acrobat, you can also do it by installing PDFCreator, an opensource program with free download from www.pdfforge.org.
It installs as a printer, so just select it as the desired printer when you print your document. The file is saved for you to email. This is a great cure for users of MS Access which has no easy way to create a file to email.
